

一个寻找设备地址的代码
官方地址:i2c_scanner(http://playground.arduino.cc/Main/I2cScanner)
这个非常简单的草图扫描了设备的I2C总线。如果找到设备,则将其报告给Arduino串行监视器。该草图是使I2C通信正常工作的第一步。
草图将找到的设备的7位地址显示为十六进制值。该值可用于使用7位地址的“ Wire.begin”功能。某些数据表使用8位地址,而一些示例草图使用十进制地址。
有用的链接
-
Arduino Wire参考:https://www.arduino.cc/en/Reference/Wire。
-
我翻译的Wire库的应用说明:https://blog.csdn.net/acktomas/article/details/88069640
-
I2C双向电平转换器(https://playground.arduino.cc/Main/I2CBi-directionalLevelShifter/),用于电平转换、上拉电阻和连接3.3V器件。
-
Nick Gammon的有关I2C的页面(关于I2C的原理介绍很详细:http://gammon.com.au/i2c(该页面上还有一个“ I2C扫描程序”)。
我将内容翻译:I2C-两线外设接口-用于Arduino:https://download.csdn.net/download/acktomas/11824487 -
robtillaart制作了“ Multispeed I2C Scanner(https://forum.arduino.cc/index.php?topic=197360)” ,可以用不同的I2C速度进行扫描。如果您使用更长的导线或使用更高I2C速度的库,则Multispeed I2C扫描仪将非常有用。(与UNO一起验证,2009年,MEGA)
草图
打开一个新草图并将下面的草图复制到其中。将其上传到Arduino并打开串行监视器。报告在I2C总线上找到的每个设备。
您可以在i2c_scanner运行时更改电线和插入式I2C设备。
 // --------------------------------------
// i2c_scanner
//
// Version 1
//    This program (or code that looks like it)
//    can be found in many places.
//    For example on the Arduino.cc forum.
//    The original author is not know.
// Version 2, Juni 2012, Using Arduino 1.0.1
//     Adapted to be as simple as possible by Arduino.cc user Krodal
// Version 3, Feb 26  2013
//    V3 by louarnold
// Version 4, March 3, 2013, Using Arduino 1.0.3
//    by Arduino.cc user Krodal.
//    Changes by louarnold removed.
//    Scanning addresses changed from 0...127 to 1...119,
//    according to the i2c scanner by Nick Gammon
//    https://www.gammon.com.au/forum/?id=10896
// Version 5, March 28, 2013
//    As version 4, but address scans now to 127.
//    A sensor seems to use address 120.
// Version 6, November 27, 2015.
//    Added waiting for the Leonardo serial communication.
//
//
// This sketch tests the standard 7-bit addresses
// Devices with higher bit address might not be seen properly.
//

#include <Wire.h>


void setup()
{
  Wire.begin();

  Serial.begin(9600);
  while (!Serial);             // Leonardo: wait for serial monitor
  Serial.println("\nI2C Scanner");
}


void loop()
{
  byte error, address;
  int nDevices;

  Serial.println("Scanning...");

  nDevices = 0;
  for(address = 1; address < 127; address++ )
  {
    // The i2c_scanner uses the return value of
    // the Write.endTransmisstion to see if
    // a device did acknowledge to the address.
    Wire.beginTransmission(address);
    error = Wire.endTransmission();

    if (error == 0)
    {
      Serial.print("I2C device found at address 0x");
      if (address<16)
        Serial.print("0");
      Serial.print(address,HEX);
      Serial.println("  !");

      nDevices++;
    }
    else if (error==4)
    {
      Serial.print("Unknown error at address 0x");
      if (address<16)
        Serial.print("0");
      Serial.println(address,HEX);
    }
  }
  if (nDevices == 0)
    Serial.println("No I2C devices found\n");
  else
    Serial.println("done\n");

  delay(5000);           // wait 5 seconds for next scan
}
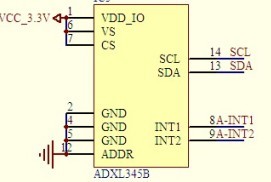
把模块按接线方法接好,上传这段代码后,打开端口监视器,就能找到在I2C上的设备地址.
版权声明:本文为CSDN博主「acktomas」的原创文章,遵循CC 4.0 BY-SA版权协议,转载请附上原文出处链接及本声明。
原文链接:https://blog.csdn.net/acktomas/article/details/101419690


暂无评论
要发表评论,您必须先 登录